






The Ultimate SEO Migration Checklist: 11 Steps to Protect Your Rankings

Changing a domain, switching a CMS, or restructuring your URLs is the digital equivalent of moving a physical store to the other side of a city. If you don’t inform your customers, update your directory listing, and change road signs, you’ll lose your usual traffic.
Customers will simply struggle to find you.
The same is true for the digital domain. Reforming your domain, protocols, CMS systems, and site architecture can all potentially ruin your online visibility and search rankings. This is why we call these processes SEO migration, given their profound impact on the SEO performance of your website.
But SEO migration doesn’t have to harm your search rankings. In fact, it can and should improve them, as the whole point of making these changes is to improve your SEO setup and make it work better.
If only you knew how to mitigate risks.
This guide is built to protect your rankings by giving you 11 clear steps packed with actionable best practices.
Why a website transition can break your business overnight
On a user’s screen and on paper, a website that just underwent a migration usually looks great. The pages load fast. The design looks sharp. The first intuitive thing most development teams do is cheer up and celebrate.
Then your tech team starts to collect the first updated lead numbers.
Organic traffic drops overnight by more than thirty or forty percent, and soon your top-performing pages begin to vanish from their usual positions in SERPs.
Where did you fail? Where did your SEO migration take a wrong turn?
This happens because Google’s crawlers don’t look at your website the way you or your customers do. Google goes straight under the hood to track a database of exact URL strings, historical crawl logs, and earned link equity.
If you don't transition your website according to a clear technical plan, you will ruin the entire database. The authority that used to flow through your pages into other websites and back is no longer doing that. The flow has become weaker or stopped entirely.
Unfortunately, these things happen more often than not. Search Engine Journal has recently published an interesting study where they tracked 892 domain migrations. What they found was that organic traffic dropped in all cases. On average, it took 523 days for a new website to recover and show the traffic stats of the previous website.
Even worse, 17% of those websites never regained their original search volume after 1,000 days.
That’s how common website failures are after a major SEO migration. And that shows how seriously website owners and administrators underestimate website migration SEO and the importance of careful transition planning and execution.
The design should always be secondary, while the technical setup should be first. The design should follow the technical database transition, not the other way around.
Even small mistakes in your site’s layout post-transition can cause serious SEO problems. And what leads to these mistakes is your minor and major actions during the migration process. For example:
- Leaving code exclusion tags active from your staging environment on your production pages.
- Modifying URL folders and trailing slash rules without a 1-to-1 matching strategy.
- Deleting old articles or media assets that hold significant numbers of external authority links.
A solid migration strategy can prevent all these and many other problems.
Below, we’ll show you what such a strategy typically consists of. 11 clear steps divided into four phases depending on the migration project’s stage will ensure you don’t follow the destiny of almost every other domain transition.
Phase 1: Pre-migration & benchmarking
This preparatory phase is what most side owners skip. And they pay a high price for that mistake. Without understanding what you own, your migration won’t succeed.
So, before you change even a single file on your server, you need to thoroughly revise your assets.
It’s similar to moving your apartment with your belongings to a new place. If you only take what is on the surface, which you see every day, but forget about things that sit behind or are simply not needed right now, you’ll end up losing a lot of precious belongings you once bought.
Your domain is your apartment, and you need to carry out a complete audit of what it’s made of.
Step 1: Crawl and document the current site structure
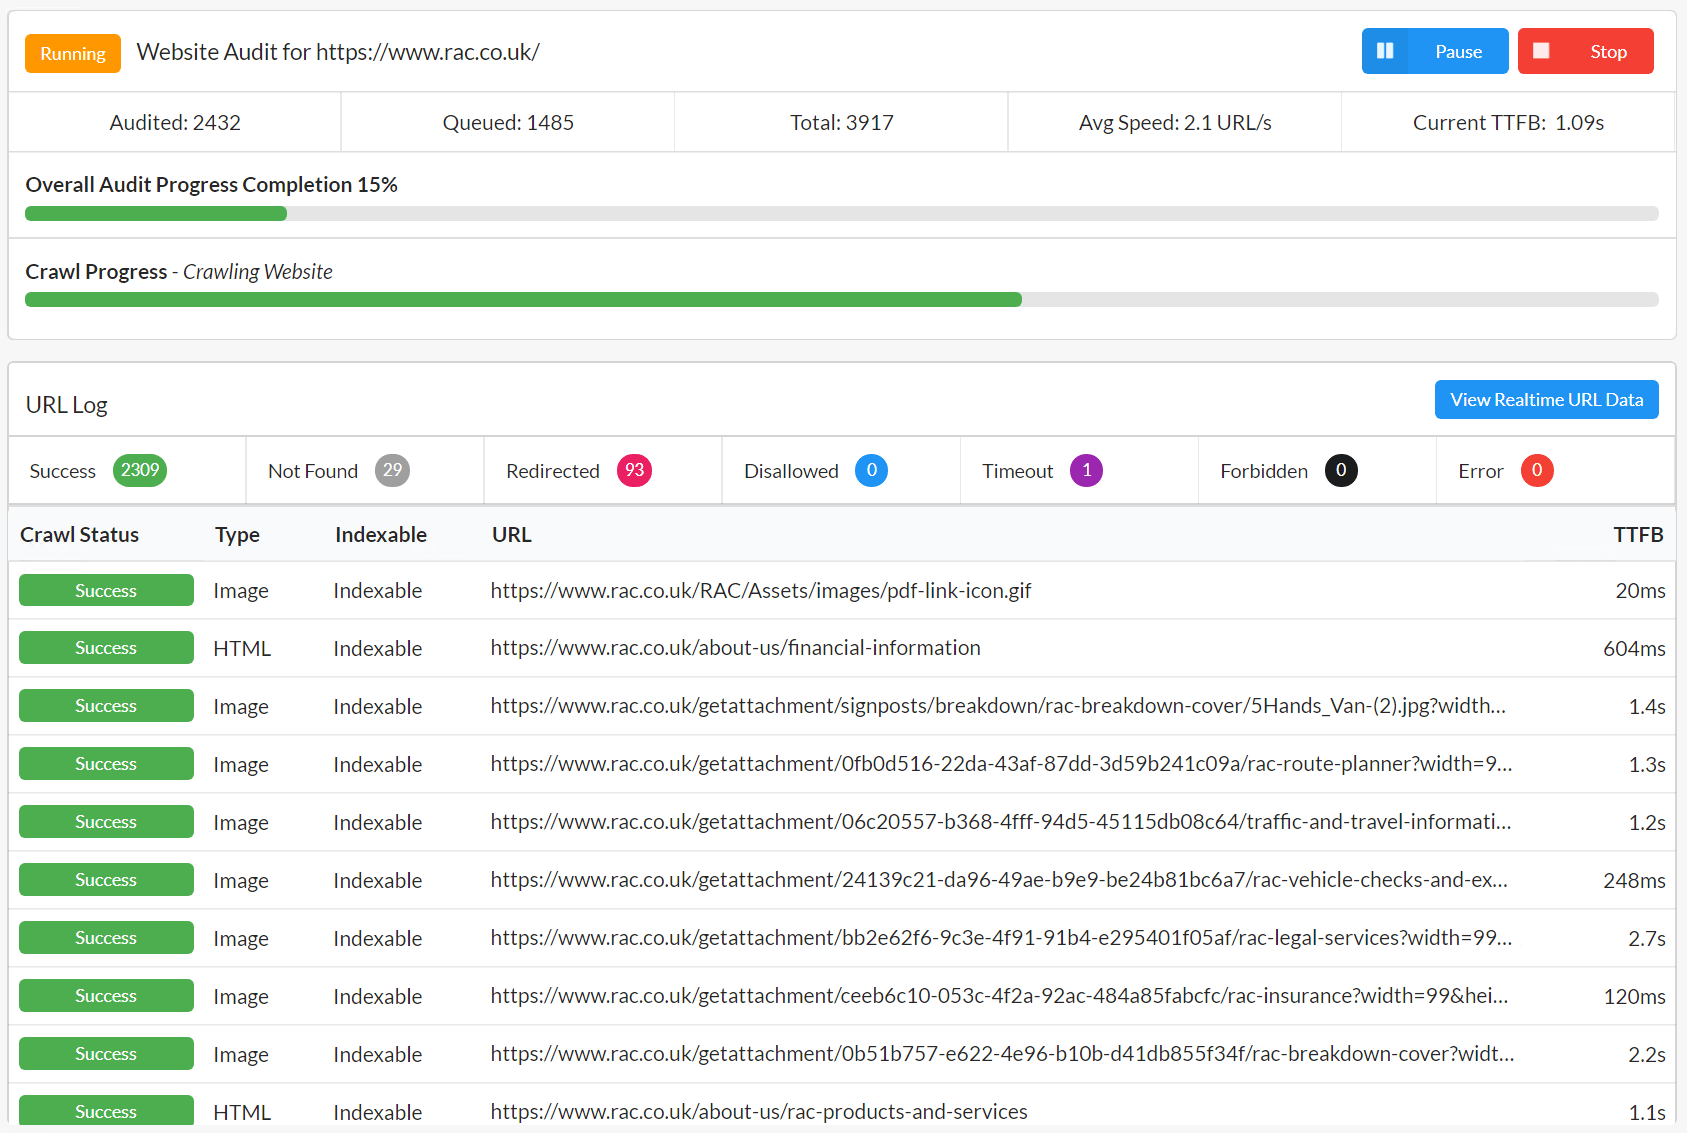
The audit should start with understanding the technical structure of your website. Use a crawler like Sitebulb or Screaming Frog to pull a complete data export of every live link.
The exact configuration of internal links and status codes should be among your findings.
The goal is to create an export file that contains the documented logic of how search bots interact with your website (the mandatory parameters are time, frequency, and depth).
Also, pay close attention to canonical tags. They’ll help you prevent internal content duplication post-migration.
Source: Sitebulb
Reviewing the following additional things will make sure your audit is complete, and you can seamlessly move on to the next stage:
- All active 200 status code URLs that currently receive search traffic.
- Meta robots tags that block specific folders from indexation.
- Labeled header tags from H1 through H3 to track text formatting.
💡 Pro tip: Besides a standard spider crawl, pull data directly from XML sitemaps and Google Search Console. This will allow you to find valuable orphan pages, or pages that lack internal links, but still receive incoming traffic via external backlinks. After the migration process is complete, you’ll save these pages and avoid losing them altogether by breaking their existing external links.
Step 2: Benchmark performance metrics
You won’t be able to effectively measure the success of your SEO migration without taking a snapshot of the current state. You need to know where you stand. This will prevent you from potential misalignment troubles.
For example, if your organic traffic normally drops in late summer, your benchmark data prevents you from blaming that drop on a coding error.
And the performance is not made of vague words like “great”, “superior”, or “good”. It is made of clear metrics. While there are dozens of possible metrics to measure the success of SEO migration, recording these four, split into three categories, is absolutely essential:
- Organic impressions and click volumes for your top-performing keyword sets in Google Search Console.
- Specific conversion rates and revenue numbers per landing page in your analytics platform.
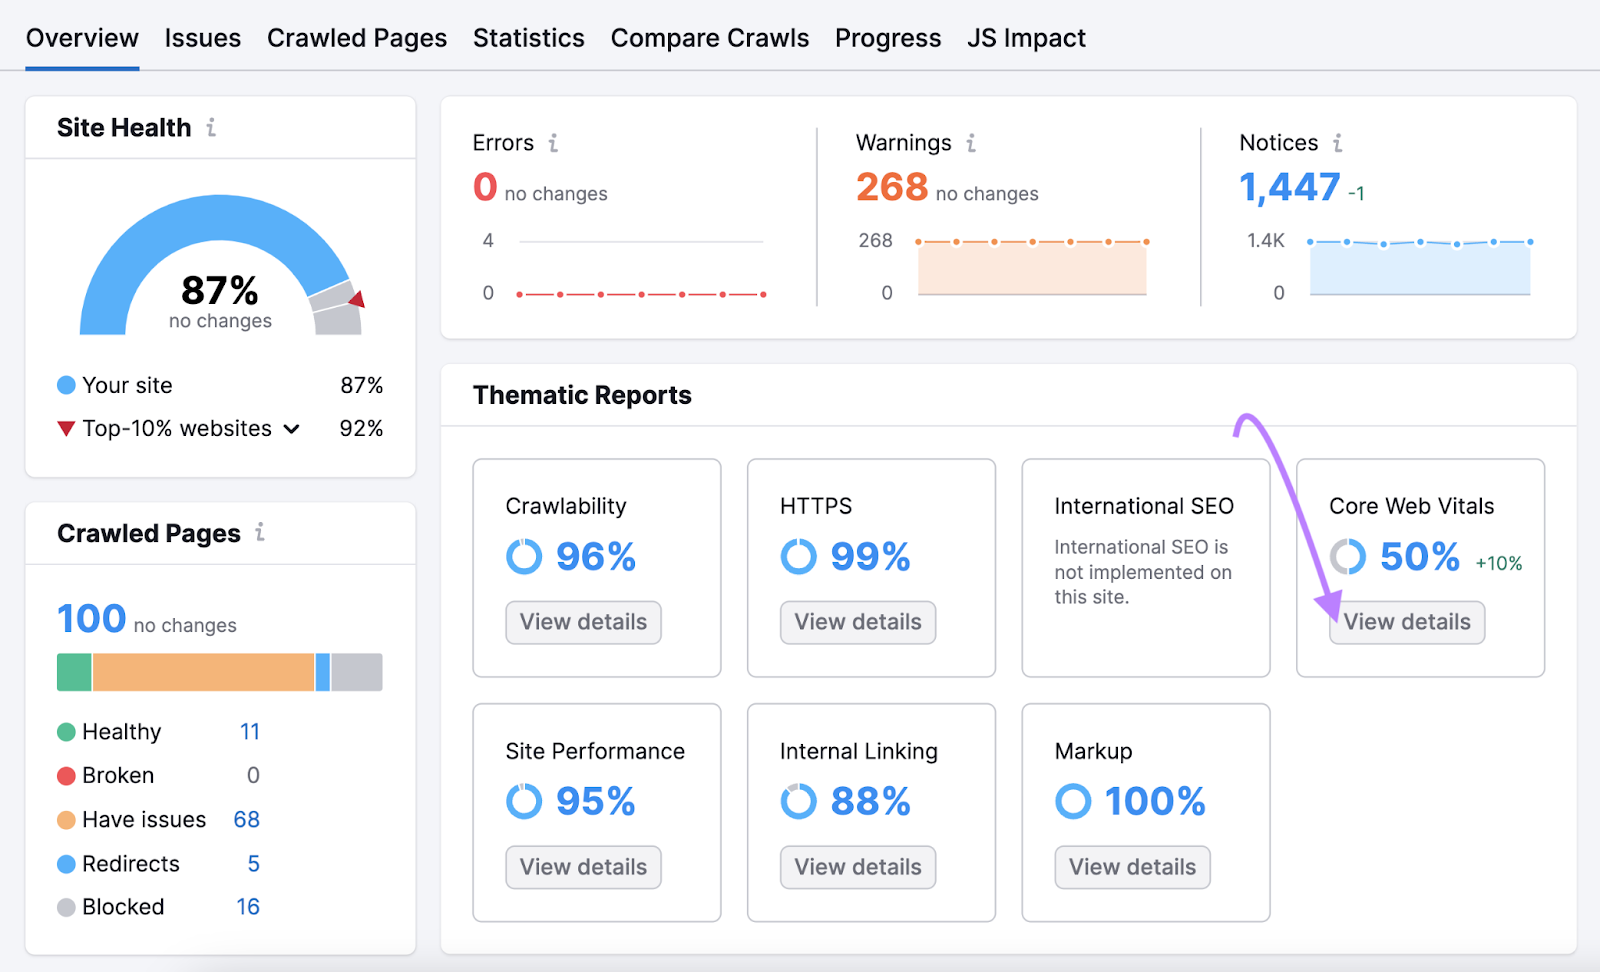
- Average page loading times and Core Web Vitals metrics across your primary site templates.
Without these exact numbers, measuring your website migration SEO success becomes complete guesswork. Plenty of tools let you run these benchmarks. For instance, Semrush can run a complete website check and include the Core Web Vitals information in its report:
Source: Semrush
💡 Pro tip: Instead of tracking these metrics’ averages across your entire website, do so on a page-by-page level. Even if your average website traffic numbers are stable, you can still miss the total collapse of a single high-value landing page.
Step 3: Identify and prioritize high-value pages
Speaking of high-value pages that capture most of your leads, drive organic revenue, and build backlink authority, you must know them all. That’s because during SEO migration, small or not-so-small errors are inevitable, and if you treat every page on your website the same, you risk neglecting the critical assets that keep your business afloat.
The best time to identify and isolate these business-critical pages is during the migration planning phase. Among other things, this will allow your team to run extra manual tests on these pages during the launch window and catch errors early.
Use tools like Google Search Console, Google Analytics, Ahrefs, SEMrush, and Moz Pro to cross-reference all your websites’ URLs and identify pages that meet these criteria:
- Pages that have earned high-authority external backlinks from reputable industry blogs and media outlets.
- Core commercial landing pages that directly generate your day-to-day sales and leads.
- High-traffic informational blog posts that currently rank in the top three positions in SERPs for competitive keywords.
- Primary navigational and structural hub pages that pass internal link equity to deeper sections of your site.
Group your findings into relevant categories mentioned above and set them aside, labeling them as “High-priority testing” or just “High-value pages for testing”.
On the launch day, run the following critical tests on these pages, checking the health of:
- Redirects;
- Content formatting;
- and meta tags.
A frequent mistake made by SEO teams during a hectic transition is looking at traffic volume when picking critical pages. Some pages may have zero traffic volume today, but contain dozens of strategic internal links that pass authority to other pages on your website.
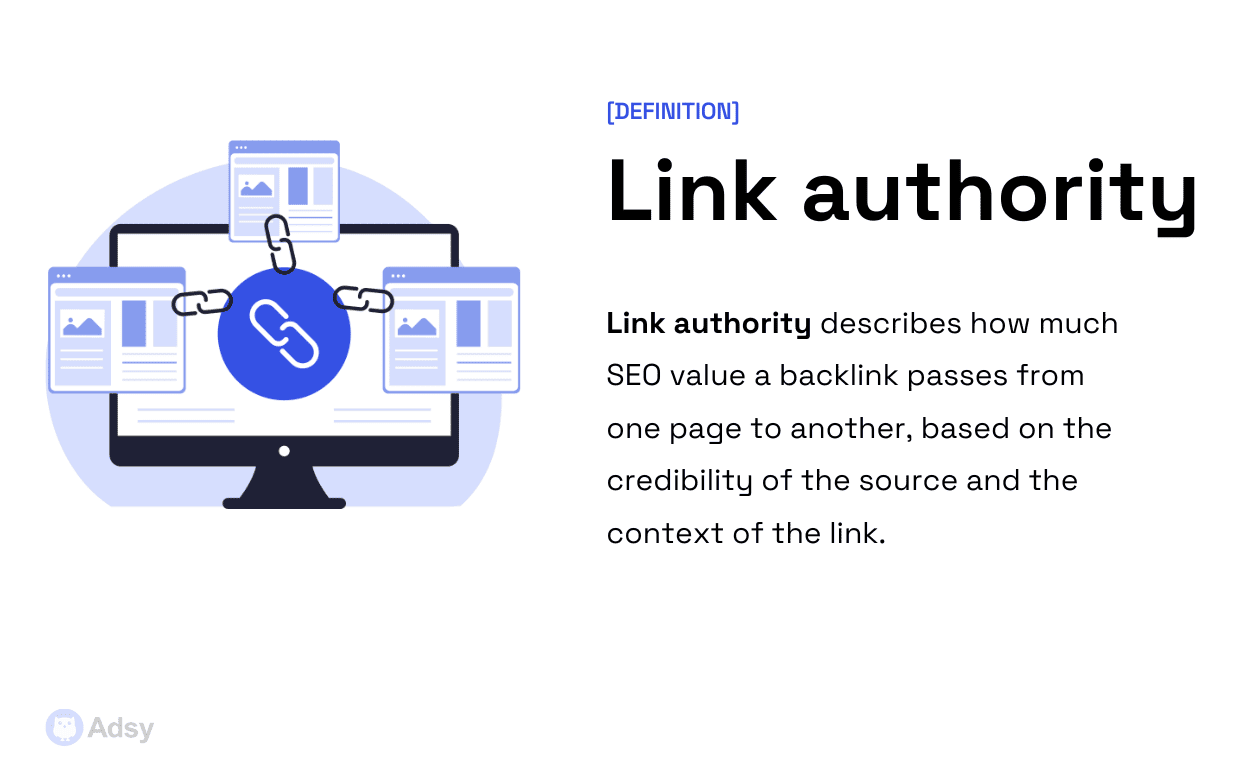
These are invisible things to GA4, but they can be picked up by manual checks run by someone involved in content creation and link-building.
Phase 2: Technical mapping & preparation
SEO migration planning is over. Time to roll up your sleeves and do some technical work.
Don’t get confused by the chapter title “preparation”. Here, you’ll be making some actual technical bridges that will carry your website data from your old infrastructure to the new one. The goal is to transform your site inventory into an actionable technical map.
Step 4: Create a 1-to-1 redirect map
A redirect map is the single most important document in your entire SEO site migration process. In essence, this map is a server-level instruction manual that tells search engine crawlers exactly where your old content has moved. You need to make a file that matches every URL on your current site with its counterpart on the new setup.
Resist the temptation to take shortcuts at this stage. As a 1-to-1 mapping is boring technical work, you may naturally want to route thousands of old pages to the new homepage, or a single most important landing page. This will only destroy keyword relevance and cut individual URLs’ authority signals.
Another important thing to keep in mind is that redirect rules will be unique in each particular migration scenario. Unfortunately, there are no one-size-fits-all solutions here.
For example, every CMS uses specific built-in rules to generate paths, folder names, and link structures. Moving a site from WordPress to Shopify automatically forces specific subdirectories into your product and blog pages, changing your links by default.
Your redirect rules must account for these platform constraints to ensure a seamless SEO site migration.
For a seamless migration process, ensure your redirect file contains the following data columns:
- The complete legacy URL path extracted from your pre-migration setup.
- The exact destination URL path on the newly built architecture.
- The intended server response header code, which must be a permanent 301.
- A notes column identifying high-priority landing pages.
💡 Pro tip: Before sending the final file to developers, group your redirects by folder path or value category. This approach has clear advantages over uploading one giant, disorganized list.
At a minimum, your server will be able to process the rules faster. But you can also count on a significantly lower page loading lag and fewer timeout errors for both search crawlers and human users.
Step 5: Prepare the new staging environment
A staging environment is basically your secure server, which you reserve for yourself and lock for Google. You can use it to test your new setup before everything goes live.
In particular, your technical team can build, design, and test the new website architecture without exposing incomplete pages to public users or search engine crawlers.
The key success factor here is that your staging environment must entirely replicate your to-be website architecture. Only by creating a realistic environment and testing it can you avoid errors and problems with your real setup in the future.
Make sure to provide your testing server with realistic load conditions, plus stress-test it with extreme loads for better reliability. Focus on evaluating:
- site speed;
- rendering scripts;
- internal link behaviors.
Also, prior to the actual staging environment launch and product evaluation, you need to verify these critical access controls:
- Strict password protection or IP address whitelisting to block unauthorized access.
- Global noindex meta directives applied to the header code of every test page.
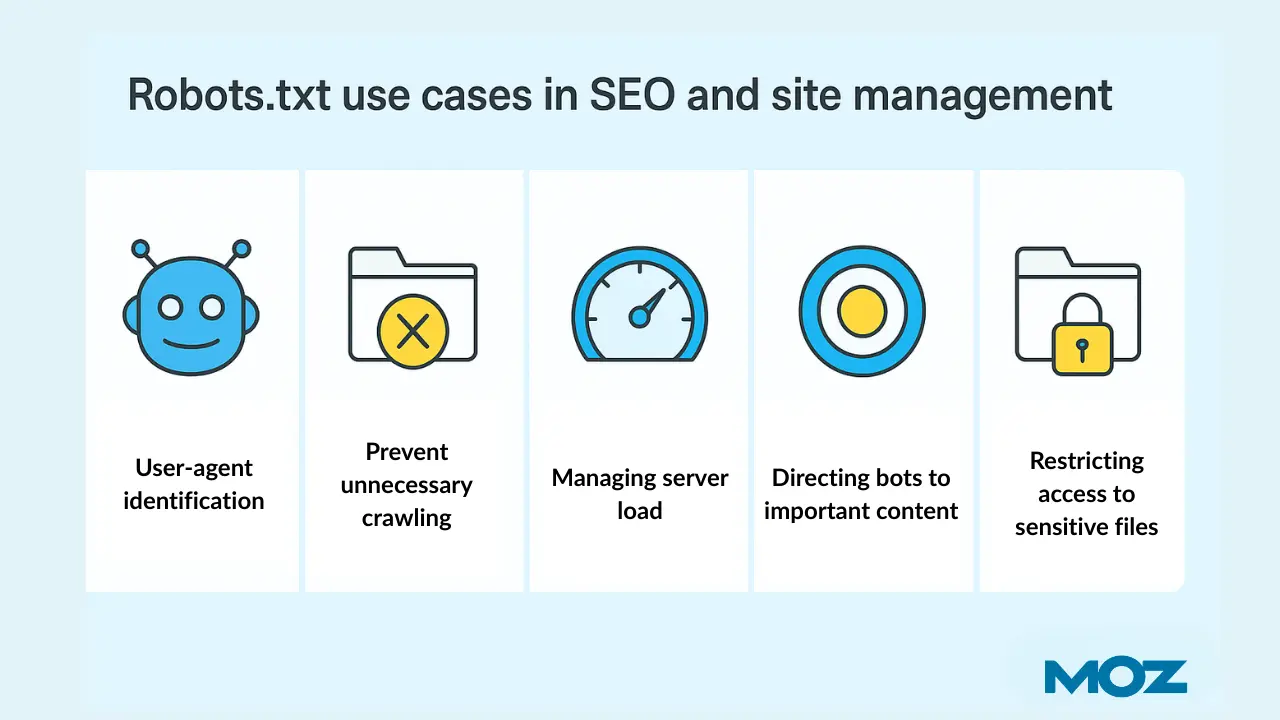
- A dedicated robots.txt file that explicitly disallows all crawling robots from parsing the directory.
Source: Moz
Your staging site is your dress rehearsal. Google must never access it, while you should run scheduled and controlled crawls to identify all sorts of errors, e.g., missing style elements, incorrect or duplicate data entries, broken internal links, and execution errors, especially within heavy JavaScript frameworks.
Step 6: Audit content and metadata alignment
Ranking in search engines depends on tangible textual signals. These usually comprise various on-page optimization methods, including logical heading hierarchies, title tags, external and internal links, and clear formatting.
When you migrate a website or change something radically on your page, you can easily erode these authority signals and lose your place in SERPs.
That’s where you need a solid content migration plan. And the very first point in this plan must be a content audit. Team up with your content manager, content creation specialists, and copywriters to pinpoint SEO-critical textual elements on your current setup. During the migration process, the goal will be to preserve and amplify their value.
At a minimum, this is what your scope of action should be:
- Mapping exact title tags and meta descriptions.
- Correct H1 through H3 headings with relevant keywords and phrases.
- Core body copy placement on all landing pages and the first page of your website.
- Image alt tags and file naming on high-traffic media assets.
Modern design often sacrifices text for the sake of vivid graphical layouts. However, search engines, including AI answer engines like Claude, ChatGPT, and Gemini, all need text to understand what a page is about.
You need to preserve the value of your current content while improving visual assets for better navigation and multi-device usability.
💡 Pro tip: Consider using a diff-checking tool (VS Code or Screaming Frog SEO Spider are among the best ones) to compare the raw source code of your current pages against your staging templates. This will allow you to quickly spot any minor technical discrepancies that you’d normally miss with a manual check.
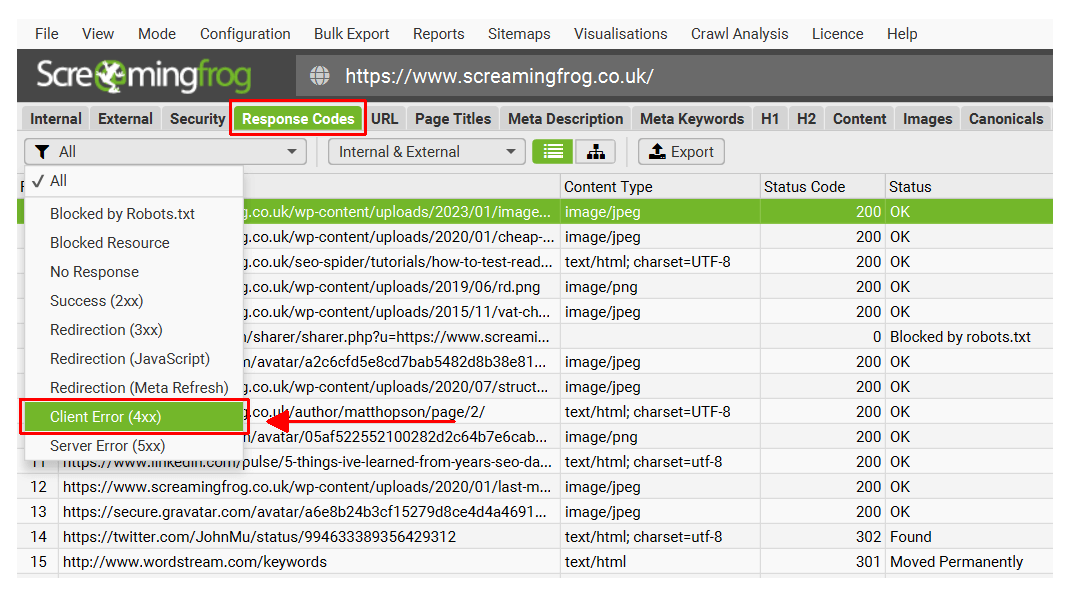
Source: Screamingfrog
Phase 3: The launch window
This is it. The critical moment you and your team have been waiting for with patience and anticipation.
But there is one thing that SEO teams only learn from experience — a launch window is not an hour or a day. It's a period that consists of several days, normally 48-72 hours in total.
During this period, search crawlers will be watching your renewed website through a magnifying glass. Think of this window as a first acquaintance, the first encounter of a new person. The initial impression of your new SEO configuration will cast a massive shadow on your reputation and authority.
That’s why the order of deployment matters now more than ever. Move methodically through every deployment step to keep your rankings safe.
Step 7: Deploy the 301 redirects
It helps to think of a 301 redirect as a permanent, unambiguous signal. This signal transmits one clear message to search engines, which in our language sounds like "this page has moved, permanently, and all the authority it earned travels with it."
Not a 302 (this command sends a different signal about you testing something temporarily). Not a meta refresh (bad for preserving link equity). And not a JavaScript redirect (tends to be poorly visible to crawlers).
It’s a clean, server-level 301 redirect signaling a moving page that takes all its authority with it.
At this point, most new teams make the same mistake over and over again. They deploy 301 redirects in batches. Usually, the first or the second batch of URLs leads to successful testing, and it’s tempting to assume that everything else will work as smoothly.
In practice, it doesn’t.
A much better approach is to use a smart tool like Screaming Frog to crawl all your redirect maps in one go. When you do so, watch for the following:
- Chains — old URL → intermediate URL → new URL. Each link in that chain costs you authority.
- Loops — A redirects to B, which redirects back to A. Those trap crawlers and tank your crawl budget.
- Wrong targets — Are they returning 200 status codes? Or are you redirecting to 404s? Into 500 server errors? Into canonical tags that point somewhere else entirely?
To avoid situations where every single page on your new server redirects to your homepage, you need to split the redirect process into clear stages:
- Your high-value pages. The ones you identified in Step 3. Those go live first because they pump SEO oxygen into your website.
- Your category and hub pages. They are the metaphorical backbone of your configuration.
- Everything else. Secondary pages, FAQs, blog posts, old landing pages, and any resources that are connected to backlinks that continue to attract traffic.
Keep your old sitemap live during the transition window. Google and other search engines will continue to visit them sometimes for months after the migration. It’s in your best interest if their crawlers find 301 redirects there, instead of a Page Not Found message with the notorious 404 sign.
Step 8: Submit new XML sitemaps
Even if you aggressively and confidently submit your new sitemap structure through Google Search Console, that’s still a passive approach. It’s like you hope for the best. That crawlers will understand everything the way you intended and will keep your website’s place in search rankings.
Here is the part that you get wrong: you think that your sitemap is just a list of URLs. Google will read them and sort everything out. But, in fact, your sitemap is much more than a technical file. It’s a signal of trust.
A well-constructed sitemap tells Google "we know what we're doing." A sloppy one says "we threw this together and hope it works."
The difference is massive. To build it right, your sitemap should include:
- Only 200-status URLs.
- No redirects (the sitemap should list final destinations).
- No 404s.
- No canonicalized URLs that point to other websites on the open web.
- No parameters that create infinite URL variations.
- Ideally under 50,000 URLs per file and under 50MB uncompressed.
If your website is bigger than that, you should split it into logical groups, for example:
- sitemap-products.xml;
- sitemap-blog.xml;
- sitemap-categories.xml.
Submit your new sitemap in Google Search Console and in Bing Webmaster Tools (Bing still drives 10-15% of search traffic in most markets). In Search Console, you should monitor at least these two reports:
- Sitemap report (to spot any possible errors during Google's processing of your data).
- Coverage report (here, Google must index all your submitted URLs; otherwise, you will see the message "Discovered — currently not indexed".
If you see the message above for more than a week, go check your internal linking system, page speed (slow pages enter Google’s low-priority lists), and content quality (as migration often ruins text structure, headings, formatting, including semantic HTML structure).
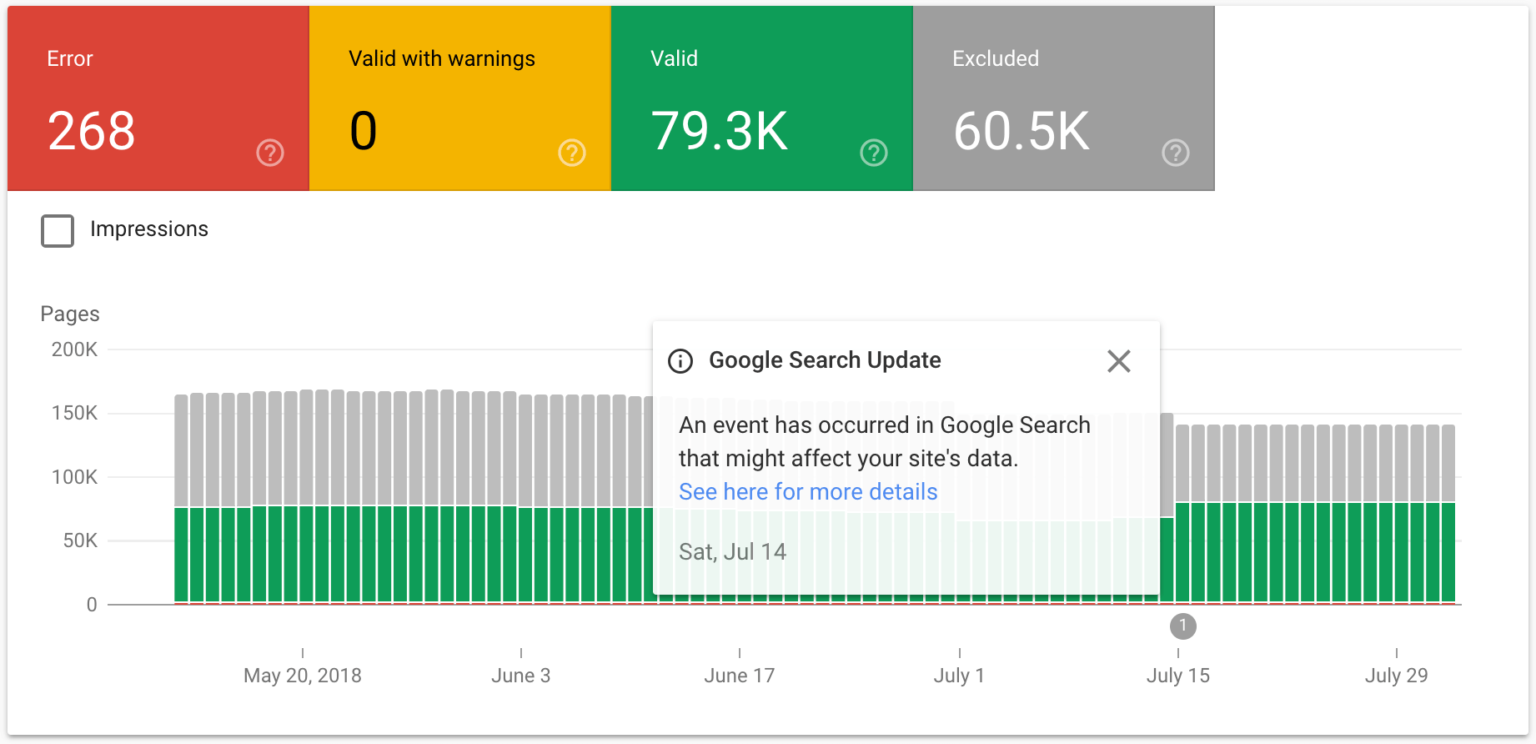
Source: Searchengineland
You cannot overdo these precautionary measures. The whole idea of the launch window lasting a few days is to spot any minor and major errors early and to be able to fix them before crawlers do any serious damage to your search rankings.
Phase 4: Post-launch verification & triage
So, you’ve launched your new website setup, but your job is far from done. If you walk away now, you will almost certainly miss critical errors that will undermine your website migration SEO process and ruin search rankings.
What you need now is active monitoring and quick repair of technical errors. No matter how meticulous your preparation and staging testing was, upon launch, things always go notas expected.
Sometimes slightly, sometimes horribly not as expected.
Step 9: Run a post-launch verification crawl
As soon as your DNS updates, open up your crawling software tool. Run a full crawl of your live domain for 24 hours and generate the report.
The first thing to check is whether your redirect map was deployed correctly on all pages. For that, load your pre-launch URL list into Screaming Frog or Sitebulb in list mode. The goal is to test every old address and check possible errors in HTTP status codes.
Other important technical failures to watch for in the report include:
- 404 error codes.
- Multi-step redirect chains that route an old URL through several unnecessary steps.
- Internal links on your new site that point to legacy addresses instead of new pages.
- 302 temporary redirect status codes that fail to pass legacy backlink authority to new pages.
Your SEO migration success heavily depends on the smoothness of redirect logic. Any single redirect rule will sever the flow of authority through your new pages and damage your rankings.
Step 10: Monitor Search Console for indexation and errors
Your crawling software shows only one side of the coin, particularly how your server responds to user actions. What you are missing is the understanding of how search bots, and sometimes dedicated synthetic users, are processing your new setup, whether they find it easily accessible and flawless, or hidden behind technical issues and bugs.
That processing smoothness has a direct impact on your search rankings.
The tool that is ideally configured to test your new server for indexation issues is called Google Search Console (GSC). When you deploy it, you’ll have a convenient dashboard with all the necessary information that you need to monitor closely at least during the first two weeks after your SEO migration.
Inside GSC, look for the Page Indexing report. It shows how fast Google replaces your old URLs with new ones.
Don’t get confused if you observe a temporary spike in crawl activity a few days after the migration. That’s normal, especially for large migrations, as search crawlers are busy making sense of your new structure.
During the two-week testing window, start every morning by reviewing these two critical indexing reports:
- Server errors (5xx) that indicate backend database overloads during heavy crawler activity.
- Blocked pages caused by leftover exclusion rules inside your production robots.txt file.
Should you see a sudden rise in 5xx server errors (the sudden spike in crawl activity we mentioned earlier), immediately scale up your server resources so search bots do not back off and continue crawling your website.
💡 Pro tip: Inside Search Console, try the URL Inspection tool (the main search bar that says "Inspect any URL in ") to manually test your top ten revenue-generating pages.
Step 11: Track ranking fluctuations and traffic recovery
The truth about even the most carefully planned and thoroughly executed SEO migration strategy is that rankings get affected anyway. But that doesn’t necessarily indicate a problem.
Rather, it’s a natural process, as search engines need time to re-index updated pages and process redirect maps. The trust of your new setup gets recalculated frequently at this point, and it’s in your best interest to fixate it at the higher than pre-migration level.
Important note! It’s quite normal to observe minor position changes during the first three to four weeks after the migration.
The key is to be able to distinguish between temporary ranking fluctuations and systemic technical failures. For that, your post-launch tracking setup should focus on three specific data points:
- Daily organic session volume on your primary landing pages.
- Keyword position shifts across your top revenue-generating search queries.
- Conversion rate stability across desktop and mobile devices.
In case your rankings fail to recover after four weeks, look for major discrepancies in your pre-migration HTML backup and current setup. In doing so, pay particular attention to missing heading and image tags, as well as broken internal linking structures.
It’s not too late to take proper care of these things. Fixing them early at this stage won’t permanently affect your rankings and will ensure a stable revenue stream.
Conclusion
Here is a helpful thought that this guide should leave you with: the success of SEO migration is not entirely based on careful planning and flawless technical execution. There is a less visible part that many teams overlook — the mindset change.
Approaching website migration SEO out of necessity or fear of breaking the site and losing rankings is exactly the mindset you should avoid. It makes the whole undertaking look like a defensive risk mitigation.
You get far better results when you treat the move as an active site upgrade designed to capture more search traffic. Look at it as an opportunity to strip away years of technical problems, to clean up tons of bloat and rebuild your SEO entirely. When done right, an SEO migration project shouldn't just preserve your current rankings; it should become a better platform, a stepping stone for your organic growth.
FAQ
What is SEO migration?
SEO migration is the process of major website changes that affect SEO performance. The changes can be upgrading a website, moving to a new domain or server, restructuring URLS, reforming protocols, CMS systems, and site architecture. SEO specialists manage these processes to retain and improve key SEO metrics like traffic and search rankings.
What is the 80/20 rule in SEO?
The 80/20 rule in SEO (or Pareto Principle) describes how only 20% of your efforts typically yield 80% of results. It means that the other 80% of efforts are much less effective. You need to know exactly what drives most of your outcomes and focus all your talents and capabilities on improving that part.
Is SEO dead or evolving in 2026?
No, SEO is not dead in 2026, nor is it likely to die anytime soon. The rise of artificial intelligence answer engines like ChatGPT and Claude has led to the booming popularity of the so-called Generative Engine Optimization (GEO). The latter focuses on natural language search queries, voice queries, and entity optimization. However, traditional SEO continues to be a strong driver of online visibility and organic traffic.
All trademarks, logos, images, and materials are the property of their respective rights holders.
They are used solely for informational, analytical, and review purposes in accordance with applicable copyright law.



 Sign Up
 Sign Up